Tag Archives: diy

The Wedding Diary: The Red Packets Box

20 May

So many craft, so little time. Indeed.. You hear us say. It has been, always been a busy weekend for Maurice and I. It was fun but very time & energy consuming! Every little details are so important to us, and so last weekend we finally finished one of the major projects/tasks for our wedding props and decorations! Drum rolls.. We are done designing and crafting our “Ang Bao” Box, also known as the “Red Packets” Box. It’s for collecting the chinese custom red packets given by the guest attending the wedding. It’s a tradition for most of the Chinese Wedding. A norm in Singapore Chinese wedding culture.

Presenting to you our garden inspired and “sew in love” wedding theme Red Packets Box. We finally found the thread spool from Art-friend. But it’s the small version and we were so lucky because that’s the one and only pack left! So we went back again yesterday to look for more however it seems they haven’t stock up on that yet. Disappointed. The Moss and Moss Felt sheet were from Art-friend as well. Art-friend has almost everything that you need for crafting.

Initially Maureen suggested that we will use ice-cream sticks as the garden fence but in the end, I decided the cotton crochet lace will do a better job! What’s left for this Red Packet is putting up the right “signs” on the lamp-post. Temporary used a sample card as the display.

Mad love the moss we bought from Art-friend. It’s a bottle for SGD22 and you have various greens and textures to choose from! This project used about 1/4 so we have more than enough left for our small flower pots, our ring pillow display, our decoration boxes and etc! However we advise that before you stick them onto anything, it will be better if you purchased the Moss Felt sheet as the base, so it will blend in nicely.

So to make this ang-bao box, these are the items you will need and the place to get them!

— Daiso ION
• Gift Box

— Maple Tree House
• Twine Thread

— Tao Bao
• Buttons
• Cotton Crochet

— Spotlight Dhoby Ghaut
• LOVE alphabets

— Agnes Maurice Wedding Kits
• Lamp Post

— Art-Friend Takashimya
• Moss
• Moss Felt Sheet
• Thread Spool
• Double-Sided Tape

Have fun crafting all brides-to-be!

Happy Monday!

xoxo,
Agnes

Crafts: Origami Kusudama Paper Flower Bouquet

4 Mar

Over the weekend, I was motivated (finally!) to craft the origami kusudama flower bouquet that I always wanted to craft for my lovely bridesmaid. I’m still in my trial and error process so bear with me if it doesn’t look that perfect yet.

Agnes Maurice Kusudama Origami Paper Flower Bouquet

Agnes Maurice Kusudama Origami Paper Flower Bouquet

A little history about Kusudama, kusudama translated means “medicine ball” and were traditionally used as incense and poutpurri, from real flowers or herbs. But now decorative kusudama are made by using folded paper origami units glued together and we see them more for decoration or as a gift. The japanese kusudama can be made into a paper ball by gluing multiple identical kusudama flower together. It will make an excellent wedding favor!

Kusudama Flower Ball, credits to origamigeek.

Kusudama Flower Ball, credits to origamigeek.

Coming weekend, we shall share a tutorial post how to make a simple kusudama flower in the next DIY tutorial blogpost!

Origami Kusudama Flower Bouquet found online

Inspired by this Origami Kusudama Flower Bouquet found online

It all started when I chanced upon this while surfing online. I was inspired by this bouquet found in Pinterest and it ignited my curiosity and passion to craft one myself! But making this requires using a styrofoam ball. I am definitely not adventurous enough to try it out yet. Not mentioning the cost of a styrofoam ball in Singapore! A typical 4 inches styrofoam ball cost $9 dollars and more at ArtFriend. But a bouquet as such takes a 6 inches styrofoam ball! So, until I’m more confident, I guess I will just keep it to wire mesh (A pack costs only $3 at ArtFriend!) to form a decent bouquet!

Over the weekend we also tried making spiral paper flower as inspired by a white dainty spiral bouquet we chanced upon online too.

Spiral Paper Flower Bouquet

Spiral Paper Flower Bouquet

Making spiral flower bouquet is 10 times easier than making a kusudama flower as all it requires are some basic circular cutting and rolling it up with a paper quilling tool. We will follow up soon with a tutorial post and also, DIY Printable for you to try at home! Did I mention before that doing paper craft is therapeutic? Should give it a try if you have some spare time! (:

Alternatively, you can also engage me for crafting lesson at my place. I’m sure it would be fun and I promise I won’t bite!

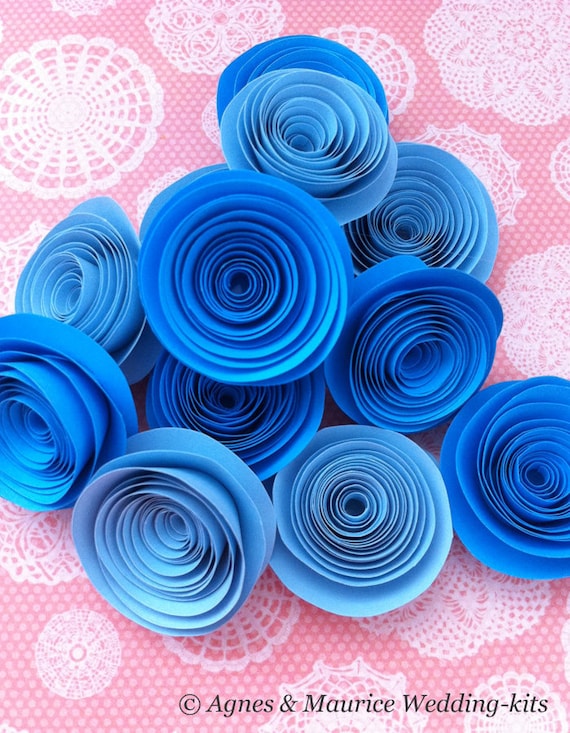
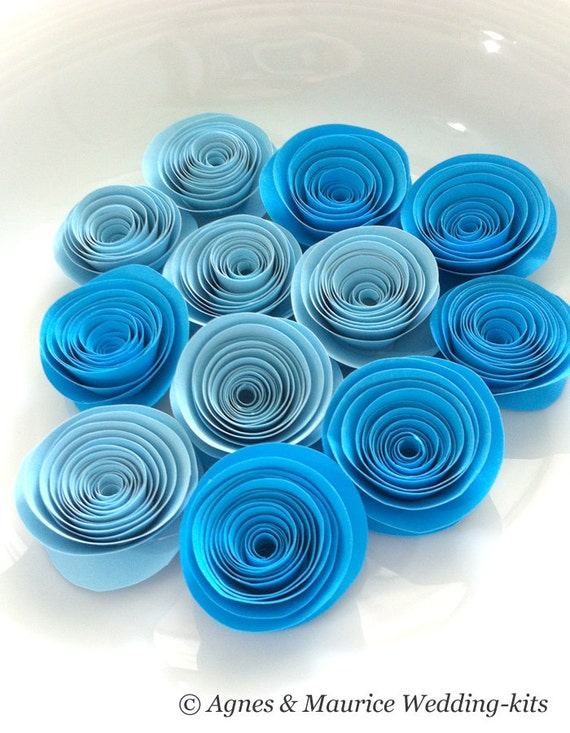
We made 12 loose paper flowers in two shades of blue. Each flower is about 1-2 inch in diameter and the paper used for these flowers is a royal blue and light pale blue. These flowers look beautiful as table decorations, as the finishing touch to gift wrap, or in a jar. They are beautiful at weddings and baby showers, sure to make a great impression as decorations for any occasion.

They are up on sale at our Etsy store. If your wedding is around the corner and you need a larger quantity but not the same designs? Or a bigger size and a different color? No worries, just drop us a convo and we will be glad to help you!

Before we end off, we hope you will have a great week ahead! It’s Monday and we know the blues.

Till then!

DIY Tutorial: Craft your own pin-wheel

2 Mar

Do It Yourself (DIY) projects allow you to create your own personalized favors and touches that can be applied in any way you can imagine. Be it on your special day, a baby shower or a birthday party. All you need are some basic items and a little creativity.

I thought some of you might want to learn how to craft your own pin-wheel and here’s a quick tutorial to guide you along!

1. Gather all your supplies. You will need some basic stuffs like a square decorative papers. The one I had was 3 by 3 inches floral paper. A needle. Tuck-pins. Decorative beads. Ruler and pencil.

2. Lay your paper pattern side down, and use your ruler to draw diagonal lines from each corner to make an “X”.
3. Find the center of your one of the squares and mark it by poking a hole through it with your needle.
4.From the center, mark one inch up, then cut along the diagonal lines from all four corners, stopping at the one inch you made.
5. Use your needle to make a hole in the right hand corner of each side of the square.

6. One by one, bring each of the four corners to the center and stick the tuck-pin through each of the four holes. Next, put the tuck-pin through the hole in the center of the square and set to lock.

7. Put a drop of hot glue at the back of the pin-wheel, and attach the bamboo stick.

Here’s our end product! Hope you enjoyed our tutorial. Any question, feel free to leave us a comment or drop us an email at hello@chapelic.com

Have a fun time crafting!